Walkthrough for Kingdoms of Amalur: Re-Reckoning covers information that aims to guide players with providing a detailed guide on how to complete various locations and main quests of the game. The walkthrough will include a list of all important items that can be found, gear such as weapons and armor, as well as information regarding related NPCs, Enemies, and Bosses.
- See Game Progress Route for a quick progression Guide
- See New Player Help for getting started tips and tricks
- See Builds for ideas on how to grow your character
- Quests, Locations and NPCs pages can help you find detailed information on a specific query.
KoA: Re-Reckoning Walkthrough
Dalentarth
Zones
- Allestar Glade (1-5)
- Odarath (1-5)
- Yolvan (2-12)
- Webwood (2-12)
- Ettinmere (3-13)
- Glendara (3-13)
- Haxhi (3-13)
- The Sidhe (4-14)
- Ysa (5-18)
- Windemere (5-20)
Main Quests
Side Quests
- A Brutal Contract
- A Tangled Web
- Aggressive Brownies
- Band of Brother Monks
- Brother Fallon's Beads
- Building Bridges
- Crisis of Faith
- Cureseeker
- Cutting the Threads
- Dangers of the Sidhe
- Flame of Rhyderk
- Gossamer End
- Grim Harvest
- Homecoming
- Hunting the Thresh
- Imelda's Charm
- Knowledge Lost
- Lost
- Members Only
- Natural Order
- Oh, the Indignitaries
- One Drop
- Order of Operations
- Out of the Past
- Plagueshield
- Rallying Cry
- Recipe for Trouble
- Red in Tooth and Claw
- Shine and Shadow
- The Antelope
- The Brownie Den
- The Fisherman's Bride
- The Flowering
- The Height of Crime
- The Widow's Wrath
- Ungentle Beasts
- Uprising
- What Ales You
Tasks
- Gathering Flames
- Hair of the Dog
- Keeper of the Keys
- Long Overdue
- Reprisal, Reprised
- Resting the Bones
- Status Symbol
Factions
Dalentarth
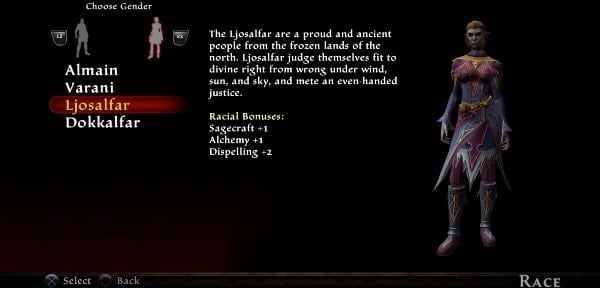
After the opening cutscene and before you gain control, you will need to create your character. In Kingdoms of Amalur: Re-Reckoning, you will be able to choose between 4 Races and a total of 12 Patron Gods. Each race will receive permanent starting bonuses to certain Skills and the Patron God you worship will provide permanent stat boosts throughout the game. You can also choose not to worship any gods and receive a permanent +1% boost to XP gain. While none of the choices you make during character creation will substantially affect the story or available quests and activities, certain combinations can make parts of the game easier or allow you to maximize your character's potential. For example, choosing Varani which starts with +2 to Lockpicking will allow you early access to locked chests and gear. For a detailed guide, check out our Character Creation page.
The Well of Souls
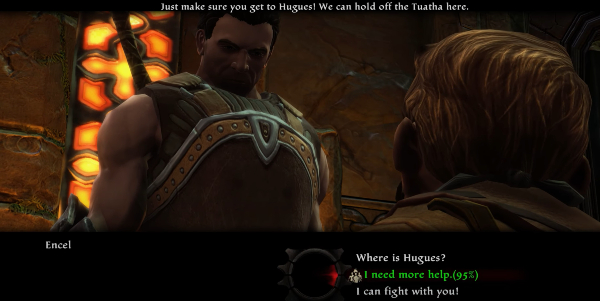
You awaken amidst a giant pile of corpses. When you regain control, head forward. Check the table for the disposal notes. The door leading out will have a skeleton holding a Rusty Longsword. Equip it and continue forwards. You will come across a couple of Giant Rats serving as your tutorial to basic combat. Further along, you will hear Encel the gnome screaming for help. Jump down from the platform and defeat the Tuatha Soldiers then speak to Encel.
- Quick tips:
- Conversations follow this basic formula: Choose options on the left to gain more information. On the right are options to move the conversation forward and progress. Upper-right choices are the 'good' options. Lower-right choices are the 'bad/evil' options. Middle-right choices are usually Persuasion checks that you can pass for unique outcomes, if your Persuasion skill is high enough. Note that good/bad choices are mostly superficial and do not affect quest outcome in any substantial way.
- Barrels, crates and other wooden objects litter the world of Kingdoms of Amalur: Re-Reckoning. Be sure to destroy these as they often contain valuable items and gold.
Loot the enemies for some gear you can equip. Head south to get to the next area. Make sure to collect the chest to the left. Check the weapons rack nearby for a Crude Iron Kite Shield. Equip it to trigger an attack. Defeat the Tuatha Soldiers and head through the hole they came in from. Pick up and equip the Longbow to your secondary weapon slot. Shoot the Tuatha Archers ahead. Arrows will automatically regenerate after a little while, so get to cover or switch to your primary weapon if you run out. Head further down and you'll come into a room with a hidden chest behind some barrels on the right. Head up the ramp and defeat the two soldiers that drop down. Loot their corpses for Rusty Leg Plates. Be sure to loot any enemies you defeat as they often drop equipment upgrades and some even have Unique items. Continue onwards and pick up the daggers from the body.
Proceed through the tunnels until you come across a lone enemy. Follow the prompt to sneak up to him for a stealth-kill. In the next room, you will learn to cast Magic. Cast it on the orb in the middle of the room. There are some notes you can pick up and a chest to the right of the southern door. Proceed onward to find a chest with Hand Wrappings. You will be ambushed by a spider here, make short work of it and pick up the Crude Birch Staff from the corpse nearby. Its attacks will allow you to burn spiderwebs and deal extra damage to the spider enemies here. Eventually, you will run into Encel again. Speak with him to proceed. There are a few chests to loot in this room as well.
- Quick Tip:
- Encel will be your first chance at a Persuasion attempt. If you have a point in Persuasion from a racial bonus, you can pass his check and be rewarded with some free potions. Many characters you interact with in Kingdoms of Amalur: Re-Reckoning will allow a chance at persuasion, so it may be worth investing points in it. You can win items, weapons or even some unique dialogue options and outcomes.
When ready, open the gate and proceed to the Laboratory. You will meet Fomorous Hugues shortly. He will tell you to meet with a Fateweaver and the tower will start to fall apart. Head north through the tunnels and continue following the path. It's best to sprint here as you can get hit by falling debris. Fend off the Tuatha soldiers and loot the chest you come across.
Get ready for your first mini-boss encounter with the Rock Troll. Pick off the two Tuatha soldiers first. They have very little health and shouldn't pose a threat. The troll has three main attacks: A standard swing which is easy enough to dodge, a charging swing from a distance which may require some good timing to avoid and a rock pellet spray which is best blocked as it spreads out in a cone in front of the troll. Go for the big openings between each of his attacks and you should make short work of him. You will have a chance for an execution move when the enemy's health is depleted, follow the onscreen prompt to mash a button and gain extra XP. Escape from the tower.
Agarth the Fateweaver
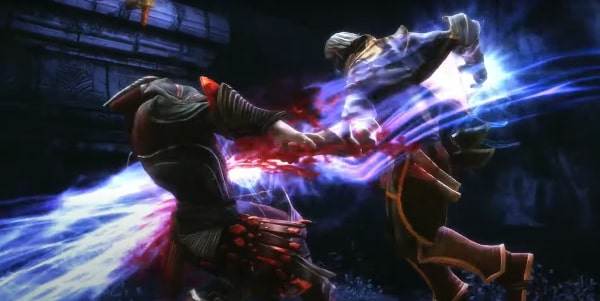
You will end up outside in the Allestar Glades. Follow the quest marker towards Gorhart. Shortly after, you will have an unavoidable encounter with Agarth. You will get ambushed by some Tuatha soldiers and introduced to Reckoning Mode. Reckoning is a powerful ability you can use when your Fate Energy bar is full, slowing enemies down and granting you a massive boost to damage and damage reduction while it's active. In addition, enemies defeated while in Reckoning Mode will become stunned and have their fates begin to unravel. You can perform a Fateshift execution move on an unravelling enemy to quickly destroy all unravelling enemies, as well as gain bonus XP.
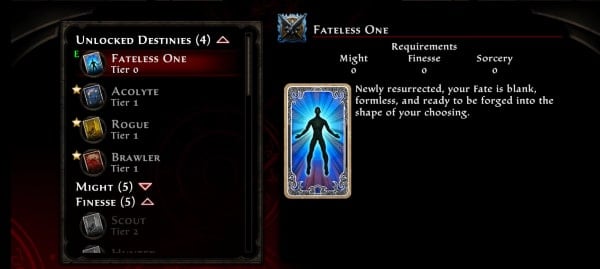
After the battle, Agarth will speak to you again and introduce you to the Destinies system. Destinies work much like the character class systems in other RPGs, tying to your ability points to provide certain stat bonuses and buffs. As you progress through the game and assign points to your Ability Trees (Might, Finesse and Sorcery), you will be able to unlock more Destinies to gain their respective benefits. For a detailed guide, see our Destinies page. For now, choose any one of the starting Destinies as anything is better than The Fateless One and you'll be able to switch them at any time outside of combat. You can also speak to the many Fateweavers you will come across to reset your ability points for a price, so you will never be tied to any one path.
Agarth will now direct you to another Fateweaver by the name of Arden. He is located at his hut towards the east past Gorhart. Continue on to Gorhart. This will be your first major hub for Side Quests and you can check out the various Merchants as well. Complete any of these side quests at your leisure and when ready to progress the main story, head out of Gorhart and follow the path along the mountains into Yolvan.
- Quicktip:
- While questing and exploring, take note of enemy and zone levels (listed on the sidebar of this guide). Enemies will scale according to your level, recalculated every time you enter a given zone. When playing on higher difficulty modes, you can expect enemies to be offset by a few levels above your own (i.e., +3 Levels on Very Hard). In all cases, enemy levels will never be lower than the minimum or higher than the maximum levels for that zone.
Arden's Hut is towards the south, just before Webwood. If you head a little further East, you will end up in Shieldring Keep, another hub for more side quests and your first opportunity to meet with and join one of the 6 Factions available. Factions are groups of individuals that have interests, beliefs and goals that make them distinct from one another. Each of the playable factions have their own stories, characters and involved questlines that provide more backstory and lore to the rich world of Kingdoms of Amalur: Re-Reckoning. Check out our Factions page for an indepth look.
Continue on to your goal and enter Arden's Hut. Inside, you will meet the mysterious Alyn Shir, who will briefly speak with you about what's going on. She quickly disappears as Agarth catches up to you. He now tells you to head to the ruins of Dellach in Ettinmere to the southwest. Cut through Webwood and stop by the town of Canneroc near the center if you'd like to tackle more side quests.
Dellach and the Theater of Fate
At the entrance to the ruins, you are reunited with Agarth. Help him slay the Ettin Shaman and he will accompany you inside as you search for a relic. Within the ruins are mostly Ettin and Wolves as enemies. It's best to focus down the wolves to make it easier to defeat the much slower, more powerful Ettin Brutes and Shamans.
This is a pretty straightforward dungeon with a similar set of rooms, enemies and chests throughtout. Follow Agarth through, fighting and opening doors along the way. Be aware of one room with a lone Kobold. Approaching it will summon a large number of Kobolds which can prove to be quite difficult. You'll come across a room with some Ettin and Kobolds at war. Use this to your advantage and take both groups out. The next room will have an Ettin Warpriest. Play safe and look for openings just as with the Rock Troll fight and it shouldn't be too difficult. Continue along the corridor, clearing Kobolds along the way as you enter the Theater of Fate.
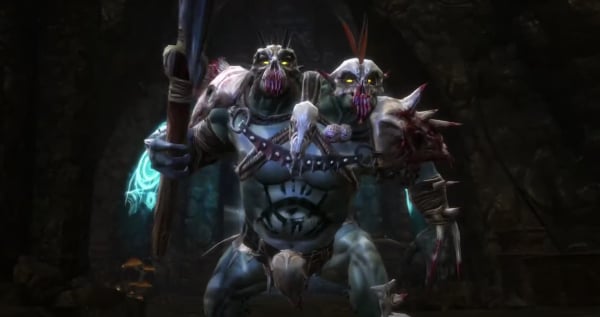
You are faced with a few Niskaru Bloodhunters. Nothing too difficult. Simply counter them after blocking their attacks. Agarth is available as a distraction and you should be able to make quick work of the enemies. Touch the Destiny Stone to receive the Codex of Destiny. You will then be ambushed by a large number of Tuatha soldiers. Defeat them and then talk to Alyn Shir to receive the main quest Old Friends, New Foes. Speak with Agarth after to receive the main quest The Hunters Hunted. You may do these quests in any order but we will proceed with Agarth's quest first. Make your way out of Dellach.
The Hunter's Pit
Fast-travel to Arden's Hut if you'd like to save time. Agarth will be waiting for you at Didenhill to the east in Glendara. Find him at the Three Lamps Inn. He will tell you about the Hunter's Pit and how you can choose two approach the mission either through the front gate, facing the bulk of Tuatha forces or the more subtle approach from the back where there are less enemies but the path is riddled with traps. Choose your approach and head for the Hunter's Pit with Agarth. He will take whichever path you did not choose.
From the Front (Hunter's Pit - West)
Choosing to approach from the front, you can expect a lot of encounters. The first two Tuatha soldiers you come across will turn around and run immediately upon noticing you, trying to alert their comrades. This camp is littered with enemy soldiers and using Reckoning mode here will prove quite effective. There is a chest to the west, loot it and continue on north. At the turn is another encounter with more Tuatha soldiers and another chest. Continue along the path onto a bridge. As you cross it, enemy archers will open the door on the other side and attempt to shoot you. Push through and note the small path on the right that leads to a dead end. There is a hidden door here that you can open if your Detect Hidden skill is high enough. Inside are three chests of loot.
Back on the main path, the route splits into a fork. Take either path for another large group of enemies. Take them out and break the crates to discover a chest. Up the nearby ramp is a pile of rocks with more treasure. Continue on and take out the remaining Tuatha. In the next room, you will see a lone Tuatha tampering with a device. Dispose of him and you are reunited with Agarth. He instructs you to destroy the device. Attack the glowing red crystal in front of you. This summons Gadflow and a scene occurs. Speak with Agarth to finish the quest.
From the Back (Hunter's Pit - East)
This path has significantly less enemies spread about generously so you can take a stealthy approach if you wish. Watch out for traps which you can only see if you have the Detect Hidden skill at an appropriate level. Eliminate the first lone Tuatha you see and proceed forward, where a group of Tuatha are found sitting by a fire for easy pickings. The path north will lead you to some cages with trapped Barghests. Freeing these beasts will cause them to engage nearby enemies which should prove useful as you're sneaking about. Loot any nearby chests and continue north, freeing more Barghests as necessary until you reach your objective.
This is where the two mission paths converge and you end up in the room with the curious crystalline device. Defeat the Tuatha guarding it, destroy the red crystal and speak to Gadflow. After a short scene, Agarth will urge you to meet with Alyn Shir.
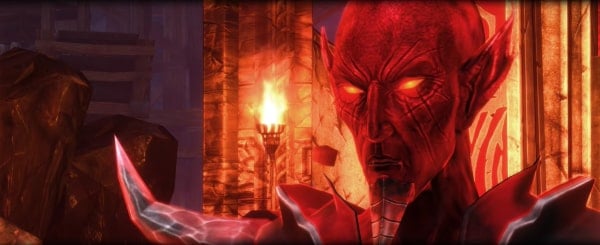
Whichever path you chose for the mission, be sure to do a quick run of the other half of the dungeon for more loot before leaving.
- Quick tip:
- The Detect Hidden skill is quite useful on this quest as there are a lot of hidden doors, piles of rocks with treasure, as well as disarmable traps. To find everything, make sure you have a Detect Hidden skill of 6 or above.
The House of Ballads
Alyn Shir will be in the House of Ballads in northern Yolvan. Fast-travel to Arden's Hut and journey north and to the west a little bit. The House of Ballads is just past Gorguath. As a large settlement, there is plenty to do here. Be sure to visit every area for side quests. You may also begin the House of Ballads Faction Quests here. To proceed with the main questline, head to the Hall of Accolades. Speak with Alyn Shir and give the Codex of Destiny to Glenial, the Fae standing next to her. He dismisses the Codex and calls it a fake. Alyn Shir wants you to seek out the High King, which requires you to enter the Gardens of Ysa. In order to enter the gardens, you will first need to speak to Nyralim. Prepare for the long trek south of The Sidhe to Caer Nyralim.
Once you arrive, head to the very top to speak to the great tree Nyralim. He is unsure of your motivations and wants you to prove yourself before he opens the path to Ysa. You are sent to defeat the Troll Matriarch Gnarsh at the Haxhi Dam to the west. Head to the quest marker and take note of the Rock Trolls and other enemies in the surrounding area as they can be quite powerful. There is a scripted troll fight as you approach the entrance so make sure the area is clear beforehand. If you are a little underleveled, pace yourself and take them out one by one as fighting more than one troll can prove difficult.
Inside, you will find Alyn Shir who was charged by Nyralim to assist you. Look for the pile of rocks by the small waterfall in the starting room for some treasure. There are plenty of piles of rock to find in this dungeon so be sure to keep a lookout if you have the appropriate skill level. The path here is mostly straightforward. Keep heading north until you are attacked by a Rock Troll. Take advantage of your ally and use her to keep the enemies distracted while you bring on the hurt.
Keep pushing forward while defeating the various combinations of Tuatha and Rock Trolls. Further along, is a Rock Troll and two Tuatha on patrol. There's an opportunity for a stealth kill with your ally, or you can just charge right in. There will be a large group of Tuatha just sitting around ahead. Once you kill them all, a Rock Troll will burst through the wall to the north. Defeat it and push forward. The next area has a sleeping troll and two Tuatha soldiers. There is a Sagecrafting station nearby that you can use, as well as a number of chests in the surrounding area. The boss fight with Gnarsh is in the following room.
Gnarsh will feel just like a souped up Rock Troll fight. She has significantly more health and deals much more damage. Her charging strike is a lot faster and she follows up her overhead smash with a quick swipe so you will want to dodge backwards for this. Aside from that, the fight is identical to other trolls. Use Reckoning when you get the chance for bonus XP.
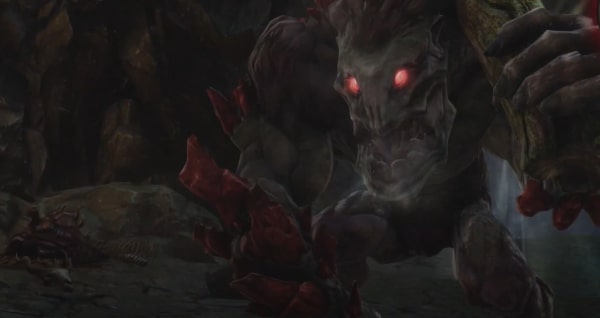
Once you take care of the beast, speak to Alyn Shir. Return to Nyralim to report your success. Pass the Persuasion check to obtain Nyralim's Grace, a unique necklace accessory. Head back to The Sidhe and make your way across the bridge. The branches and vines should open up, giving you clear passage to The Gardens of Ysa. Speak with Chancellor Erawn to complete the quest.
High King Titarion
With both main quests completed, you may proceed into Ysa to meet High King Titarion. Head east past the Font into the Court of Summer and place the Codex of Destiny on the pedestal. Listen to Titarion's tale. At the end of the cutscene, the quest ends and the High King tasks you with stopping Gadflow. Speak with Agarth and Alyn Shir to begin the quests An Old Friend and The Great General, respectively. We will proceed with Agarth's quest first. You may also check out and complete the many sidequests available in Ysa and the rest of the settlements around Dalentarth as you'll be moving on from this region henceforth.
Agarth has found a lead on our old friend Fomorous Hugues. You are to meet his superior Octienne in The Hollowlands of Detyre. This will be a long journey so prepare well. Leave Ysa and head directly south of The Sidhe. Make it a habit to visit settlements, ruins and caves to unlock Fast-travel options as we will be returning later.
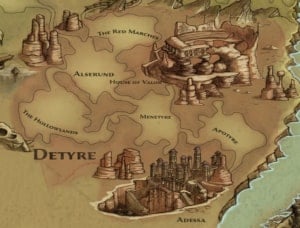
Detyre
Zones
- The Red Marches (8-20)
- Alserund (8-21)
- The Hollowlands (8-22)
- Menetyre (8-23)
- Apotyre (8-25)
- Adessa (8-25)
- House of Valor (8-99)
Main Quests
Side Quests
- A Master's Touch
- A Silver Tongue
- Applied Science
- Bloodbane
- Bone Town
- Century Flowers
- Community Service
- Executive Orders
- Fae at the Mine
- Fellfire Bloom
- Hand-Delivered
- Her Righteous Fury
- His Brother's Keeper
- Into the Breach
- Kidnapped
- Making Enemies
- Miners in the Sand
- Missing Keys
- New in Town
- Opening a Vein
- Paper Trail
- Return to Sender
- Runaways
- Running with Scalpels
- Shipping Error
- Spider Season
- The Crossing
- The Messenger
- The Tithes that Bind
- Time of Need
- Under Watch
- Whereabouts Unknown
- Worth Fighting For
Tasks
- Aron Excavations
- Dinner Time
- Lab Assistant
- Rock Collection
- Sandstone Villa
- The Cynrics
- The Darkvari
- The Zungars
- Tinker's Tank
- Whitestone Tarnished
Factions
Detyre
The Hollowlands
Cut through Alserund towards the west to reach The Hollowlands. Octienne will be further west, high up at the Overlook Camp. You may drop by Motus Mining Outpost on your way to tackle some side quests. Speak with Octienne to learn of Fomorous Hugues' last known location, the Saltwell Caverns. Travel southeast to your destination. Inside, you will find the place is riddled with traps and large battles with mostly melee enemies (Fae Gorta and Sons of Laz). Take note of the many gnome corpses strewn about as they will often have keys required to progress in the dungeon or unlock supply crates. The dungeon is pretty straightforward otherwise.
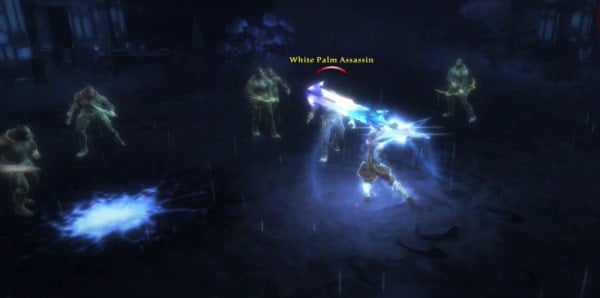
Eventually, you will make it to Hugues who will begin a conversation with you automatically. The conversation begins to unravel many mysteries including Octienne's hidden agenda. Your reunion is cut short by a gang of White Palm Assassins sent to kill Hugues and you are thrown into combat. Upon their defeat, Hugues tells you about Ventrinio and to seek out Templar Jorielle in Adessa. This begins the Enemies in High Places main quest.
Leave the caverns and head east through Menetyre. You can take a detour here to Ironfast Keep for some Warsworn faction quests. Once you reach Apotyre, keep heading southeast to get to Adessa. Take note of the many mines in this zone. They are tied to side quests found in the Motus Mining Headquarters and the Travelers faction's Sun Camp to the east.
Adessa
At Adessa, you are stopped and question as you approach the city. You are given the key to your new home here. This is another massive city with many shops and side quests to take on when you have the time. Head to the south of the city and enter the Domus Politica where Templar Jorielle can be found atop some stairs. Speaking with her will prove less than fruitful as she does not buy into your story. As you exit the building, you are stopped by her aide and given direction for your task. The quest marker will lead you to the Livrarium where you can find Octienne. After your brief conversation, he will run off in a fit of rage beginning a chase sequence boss battle. Loot the chest in the room and head out to the platform.
The battle will occur in phases, with Octienne switching areas after you get his health down to a certain level. He will continually summon White Palm Assassins to attack you. An important thing to note is that you cannot kill Octienne until he has reached his final destination in the chase. He will periodically put up a magical barrier that renders him invulnerable. This signals that you need to defeat the remaining assassins in the area before Octienne moves on to the next.
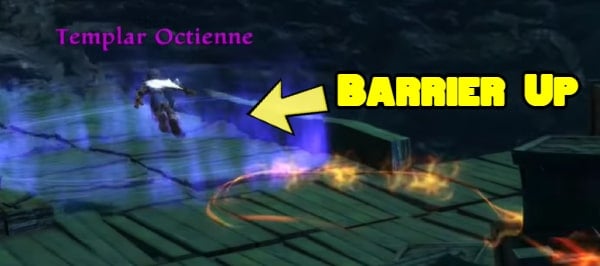
Octienne himself is quite a competent fighter who will constantly throw Fire and Ice spells at you. Be vigilant with your blocking and dodging as you whittle away at his health while fending off his assassins. At the end of the chase, you will send Octienne crashing through a window in defeat. Speak to Jorielle who will thank you for exposing him, then talk with Hugues who will send you to Klurikon in search of Ventrinio. The quest is completed and you will be rewarded a Twist Of Fate - Unraveller for your efforts.
Before we can get to Klurikon, we must first complete Alyn Shir's quest The Great General. Upon receiving the quest, she tells you about the city of Mel Senshir which you will need to take back in order to get to Ventrinio. To do this, you will need the help of one General Tileria. Alyn Shir tells you to meet her in Emaire in the Plains of Erathell. This will be quite a long trek from where you are but you can Fast-travel to Ysa to close the distance. Alternatively, you can take the route north of The Red Marches to get to the plains, cutting through Tala-Rane and The Wolds to get to Emaire. This will unlock many Fast-travel options to make the upcoming quests easier.
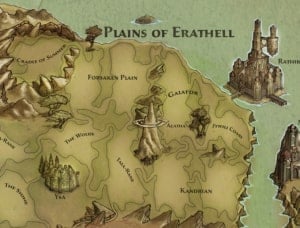
Plains of Erathell
Zones
- The Wolds (8-20)
- Forsaken Plain (8-21)
- Tala-Rane (8-22)
- Kandrian (8-23)
- Galafor (8-23)
- Tywili Coast (8-25)
- Rathir (10-25)
- Cradle of Summer (10-25)
Main Quests
Side Quests
- A Page-Turner
- A Pilgrim's Setback
- A Second to a Duel
- Bad Blood
- Bell, Book and Candle
- Buried Alive
- Castor's Wrath
- Collections
- Derfel's Labors
- Deserter's Deserts
- Every Sparrow Fallen
- Family Arms
- Floodgates
- Good with Locks
- Learning Curve
- Mixing Business
- Niahm's Labors
- Out of the Ruins
- Raising the Dead
- Ratofer's Pawns / One Man's Trash
- Rivener Tarsus
- Sisterly Love
- Strict Accounts
- The Aster Inheritance
- The Best Defense
- The Erathell's Blessing
- The Orison
- The Tinker's Daughter
- The Treasures of Culn
- The Valley of the Blessed
- The Waters of Madness
- They Walk Among Us
- Tidings of War
- Tirin's Secret
- Unlucky Charm
- Vane's Luck
- Wrest from Peace
Tasks
Plains of Erathell
Cradle of Summer
Make your way to Emaire in The Wolds. This little village and its residents will provide a variety of services including merchants, Fateweavers, Blacksmithing Forges, as well as a number of side quests. When ready to proceed, enter the Blue Bear Tavern and speak with Alyn Shir. She tells you of how General Tileria lost Mel Senshir to the Balor and is now looking for an ancient legendary weapon to destroy him. You must now head to the ruins of Urul-Tusk in the Cradle of Summer to the northwest. Take the path north out of town.
Once you arrive at Urul-Tusk, speak with General Tileria to learn about the Windstones and how they may be the key to opening the doors to the ruins. Accept the Erathi Windchime she gives you and use it on the Ancient Windstone nearby. You will be ambushed by a Niskaru Bloodhunter, so be prepared to fight. Speak to General Tileria and she will task you with finding the four other Windstones and striking them with the chime to open the door to Urul-Tusk. This task will take you all over the Plains of Erathell and could take a while. Take note of the various settlements and side quests available as you move through each zone.
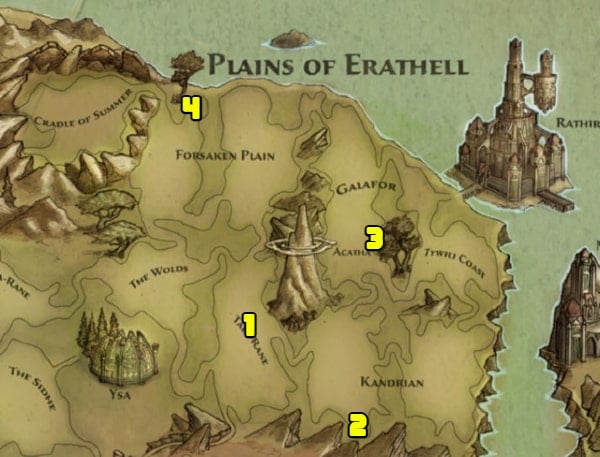
You may do them in any order but for the purpose of this guide, the locations of the four Windstones are as follows:
- Central area of Tala-Rane. Striking this will summon two Niskaru.
- South of Caer Tosai in western Kandrian. There are a few Tuatha and a Jottun in the area, and another group will appear after striking the stone.
- Northeast corner of Acatha. Be prepared to fight four Niskaru Bloodhunters.
- Northeast corner of Forsaken Plain. This will trigger a fight with a Niskaru Tyrant. You can immediately run away as this can be a difficult fight, but if you choose to engage him, be aware of his prolonged fire breath attacks and his incredibly fast dash attack. Use lightning attacks for a chance at stunning him and Fateshift when you can.
After striking the fourth Windstone, make your way back to Urul-Tusk. Enter the ruins and head west through the narrow pathway. When you reach the fork, you are ambushed by three Niskaru hunters. Take the left when you reach a staircase for a chest. Head down the steps for thre more Niskaru and another chest in the southern corner. Proceed west and you will see two more Niskaru enter. There is another chest in this room.
Keep moving forward until you encounter some Giant Rats. Dispose of them and collect the two chests in the following room. Head east towards a hidden passage and pull the Erathi Sigil-Stone to proceed. Head down and dispose of the two Niskaru, then check behind the stairs for a chest. The room above the stairs will begin a boss fight.
General Tileria will require your help keeping the Niskaru busy while she pulls the spear out. After the cutscene, two Niskaru will jump out at you. Once defeated, three more will come running in. Make quick work of them and the boss Azaghaal will make his appearance. This fight is similar to the Niskaru Tyrant at the final windstone. Azaghaal will shoot fireballs from his mouth and can also use a frost breath attack dealing high magical damage. Watch out for his stretching arms that have quite some range. Azaghaal will use a tail spin attack when at melee range and will attempt to close the distance with a powerful charge if you're too far away. The charge is easy to dodge and leaves him vulnerable to a counter.
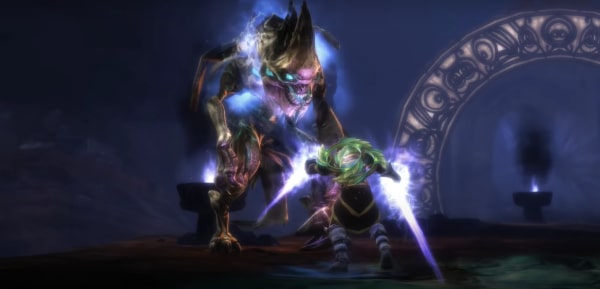
Once Azaghaal is defeated, Tileria will be able to pull out the Piercing Light. With legendary weapon in hand, she tells you to meet her in Rathir so you can get to Mel Senshir. Leave the area and proceed east to the great city.
Rathir
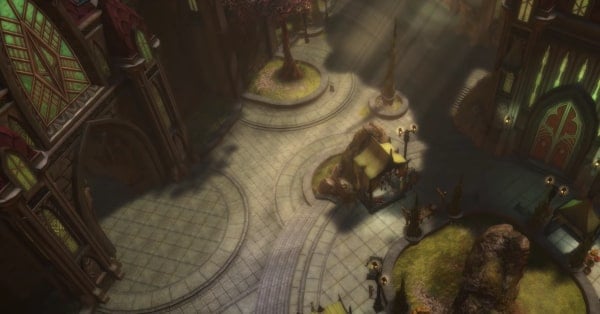
Make your way up to the upper city to speak with Elund Carth and convince him to send troops to Mel Senshir with you. Passing the Persuasion check will reward you with the unique Elund's Ring. Take this time to tackle any side quests in the city you wish to complete. Once ready, head down to the docks and speak with Commander Owaiglyn to set sail for Mel Senshir.
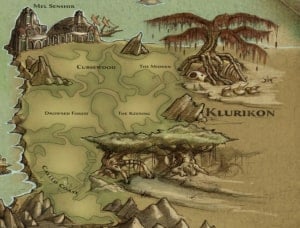
Klurikon
Zones
- Mel Senshir (13-99)
- Cursewood (16-31)
- The Midden (16-31)
- The Keening (16-32)
- The Drowned Forrest (16-32)
- Caeled Coast (16-33)
- Field of Huber (16-34)
Main Quests
Side Quests
- A Time to Reap
- Artifacts and Castles
- Brun the Bard
- Deadeye
- Elf's Best Friend
- Eyes and Ears
- Ghosts of Seawatch
- Malicious Practices
- On the Hunt
- Remembrance
- Rite of Honor
- Spawning Pools
- The Blades and the Seal
- The Lady's Children
- The Last Gastyr
- The Lost Squad
- True to the Cycle
- Witch Knight of Ghennig
- Worthy of Chernobog
Tasks
Factions
Klurikon
Retaking Mel Senshir
Upon arrival, you should make your way to Owaiglyn. He will brief you on the situation and his plans to take the city back from the Tuatha. He will give you some time to prepare and check out the city. Being the sister city to Rathir, Mel Senshir is quite massive indeed. There is quite a lot to do here but because everyone is gearing up for battle, it's best to hold off on side quests until after the battle. Make all the necessary preparations. There are Master-level trainers in the city and Agarth is available for Fateweaving, should you wish to rearrange your skill points and reset your destinies. There are also merchants that provide a variety of powerful weapons and armor.
When ready, speak to Commander Owaiglyn at the gates to begin the battle. After the cutscene, speak to General Tileria and proceed towards the quest marker, facing off against some Tuatha Soldiers.You will reach a room with two Tuatha Priests and a few chests in the corners. Proceed northeast and watch out for the traps. You will pass by a swinging axe trap and then a spinning blade trap atop the stairs. The next room will have blades popping out of the ground. Nothing too difficult.
At the balcony, the Tuatha will prop up two siege ladders and swarm the area. Alyn Shir will be here to help you fight them off and break the siege ladders. When you get to a fork, pick either path. They both lead to the same area. Try to save your imprisoned comrades along the way as they will assist you for a time. At the next balcony, fend off the Tuatha with the soldiers and break more siege ladders. There is a Blacksmithing Forge in the next room, as well as five chests. Loot everything and prepare for the upcoming boss battle. When ready, head out onto the ramparts.
Take out the few Tuatha Priests and Soldiers along the way. You will see Tileria facing off against Witch Knight Malwyn. Approach and Malwyn will summon the Balor. Malwyn is a Fighter-Mage and is quick and relentless. Your attacks will not make him flinch or interrupt his attacks but he is susceptible to stuns and paralysis so utilize abilities like Storm Bolt, Quake and Ice Barrage for some breathing room if you have them. Malwyn will periodically teleport to a tower in the distance and signal the Balor to blast you with an eye beam. This will deal a massive amount of damage so make a beeline towards General Tileria who will shield you both from the attack. Continue to whittle away at Malwyn's health and watch out for his Tuatha helpers. After the battle, loot Malwyn and enter the Battlements.
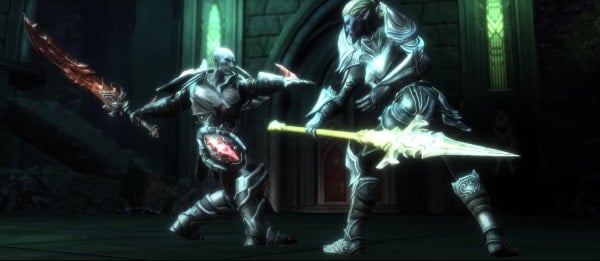
You will run into Agarth who will send you off to fight the Balor. With his help, defeat the soldiers and priests in the next room and continue heading north to fight three more soldiers. Loot the chest and head up onto the balcony to kill some archers. In the next room are two more Tuatha and a Prismere Troll. Clear the room and loot the chest. Past the gate is Captain Mys, with whom you can pass a Persuasion check for him to join you. In the next area, dodge the Balor's eye beams and grab the chest then dash towards the next area.
Defeat the Tuatha Zealots and face off with the Tuatha Priest who will summon a Niskaru Tyrant. Take out the Priest first and carefully use stuns to quickly defeat the Tyrant. Head out onto the platform to begin the next boss battle.
You will be fighting the Balor on a large, open platform. He's not very difficult and he cannot move around but watch out for the quick claw swipe from left to right and dodge to the very back of the platform. It's best to have a ranged weapon for this fight in order to continually deal damage to the Balor. When you see his eye glow, run towards the front of the platform and get under his eye beam, he can't aim the beam too close to himself. Periodically, the Balor will slam one or both of his claws and they'll be stuck in the ground and susceptible to melee. Deal enough damage and his face will fall to the ground so you can continue the onslaught. Once his health drops to 0, you will be able to perform a series of execution moves that pin his claws to the ground. Follow the onscreen prompts to execute him. If you miss, the Balor will heal a bit of health and you will need to whittle him down again.
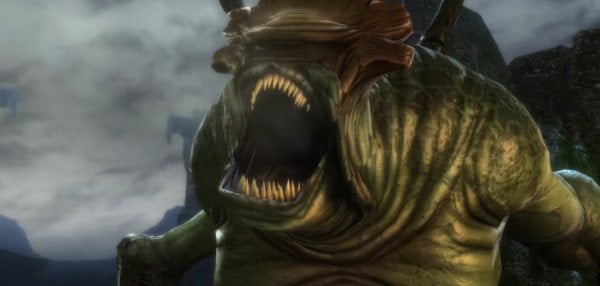
When the battle is over, you'll be back in Mel Senshir. Speak to Commander Owaiglyn to finish the quest and claim your reward of a Twist of Fate - Siegebreaker and a random weapon, armor or item. The quest Silence Falls will now begin.
The Prismere Chantries
Outside the city, you will meet the former Prince of the Winter Court, Cydan. He seems to know your allies Agarth and Alyn Shir and he will ask for your assistance in defeating the Tuatha. He asks you to meet him at Foes' Hearth at The Midden, east of the city. Make your way east and be wary of the powerful monsters along the way. They will be much tougher than anything you've faced thus far.
At Foes' Hearth, you will be approached by Bisarme, the leader of the House of Sorrows and be given the opportunity to begin those faction quests. Meet with your allies and Cydan will explain about the Prismere Chantries found all across Klurikon, suggesting to destroy them to weaken Gadflow's influence. These are similar to the ones you destroyed at The Hunter's Pit with Agarth.
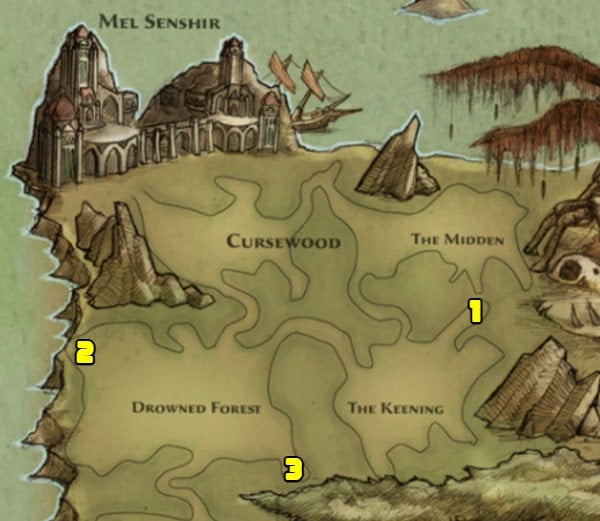
You can do these in any order. The locations of the Chantries are as follows:
- Northeast corner of The Keening. There are several Tuatha Raiders guarding the chantry. Upon destroying one of its crystals, Gadflow will make an appearance. After the scene, destroy the remaining crystals.
- Northwest corner of the Drowned Forrest. This one is guarded by a bunch of Tuatha Zealots and Tuatha Overlords. Destroy one of the crystals for another conversation with Gadflow, and then destroy the remaining crystals.
- Southeast corner of the Drowned Forrest. Guarded by more Tuatha. Gadflow will taunt you once again. Destroy all the crystals.
Once completed, fast-travel back to Foes' Hearth and speak with Cydan to finish the quest and receive Cydan's Faeblades. In return for your help, Cydan promised to teach you of a way into Dannestar Isle to find Ventrinio. He asks you to meet him and Alyn Shir at the Caeled Coast to the south.
Echoes of the Past
Cydan and Alyn Shir can be found west of Odi's Camp at the Caeled Coast. Speak with them to learn about the Shadow Walk, then step into the shadowy black cloud. You will be transported to Dannestar Isle to begin the search for Ventrinio. You see Alyn Shir running towards the tower. Follow her and you will get ambushed by the undead Sons of Laz. Use Fire and area-of-effect attacks to make quick work of them. Alyn Shir will eventually dispel the magical barrier allowing you entrance. She will stay behind to cover the rear from more undead.
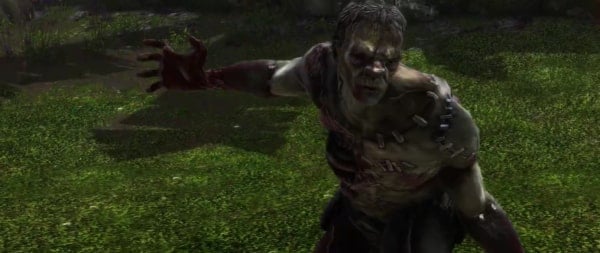
Follow the linear path up the tower, taking out the Sons of Laz and Faer Gorta you encounter. You will get to large, round room with Faer Gorta and Ancient Leanashes. Take them out and continue climbing to get to Ventrinio. After a brief conversation, you will be attacked by a large force of Sons of Laz, Faer Gorta and Ancient Leanashes. Defeat both waves and try to loot the room as fast as you can as the tower will begin to collapse and you will automatically be transported outside. Speak to Ventrinio to complete the quest and be rewarded the Soul Lens unique talisman. Ventrinio will give you the next main quest, Pride Before a Fall and tell you to meet him at the Field of Huber back on the mainland.
The House of Pride
Travel to the southernmost part of Klurikon, towards the quest marker. Speak with Agarth and after a brief conversation, Ventrinio and Alyn Shir arrive. Ventrinio will tell you about Callis Dren, guardian of the House of Pride and defender of the entrance into Alabastra. Dren has a powerful enchantment that renders him impervious to all attacks but Ventrinio has found a way to get past him. He grants you the Essence of Valor, which will protect you from Dren's attacks.
Find Dren at the steps leading up to the House of Pride. After a brief conversation, a fight begins. After a moment, it becomes obvious that neither one of you can harm the other and Dren proposes an agreement. He will forfeit his blessing and grant you a fair duel if you do the same and promise to liberate the House of Pride. There are a couple of Persuasion checks here, but neither one affects the outcome other than Dren's dialogue.
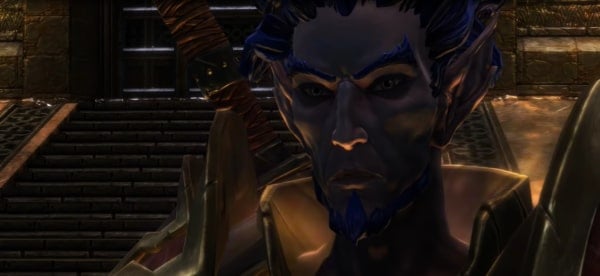
The real fight begins. Dren fights much like Malwyn and will utilize a lot of sword strikes and spells. Be wary of his medium-distance teleport where he leaves fire runes at his starting point and destination. They explode based on proximity. He will periodically blow on his horn to buff himself, indicated by a red aura. This increases his attack damage and grants him access to the Tornado spell. Unlike Malwyn, his attacks can be interrupted at any time.
After defeating Dren, Agarth will come running over and you will be tasked with killing Witch Knight Myrna in the House of Pride and destroying the Tuatha within. Head inside and engage the Tuatha Soldiers. You will have three allies in the form of Faeblade-wielding soldiers, but don't rely on them too much as they can die easily. Make your way past the various rooms and enemies. There is one Bolgan in one of the rooms. Eventually, you will run into the Knave of Pride, who promises to support you once Myrna is dead and the Prismere Chantry destroyed.
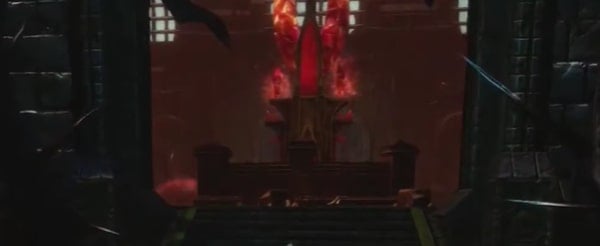
Past the Knave, the fight with Myrna will commence. She's not particularly difficult but watch out for the Faer Gorta she summons. Myrna herself is easily put into stunlocks and should not put up much of a fight. Once she is dead, continue forward to the Chantry. Defeat the two Tuatha guards then destroy the chantry and you'll have another brief conversation with Gadflow. Return to the Knave of Pride to finish the quest and receive Twist of Fate - Unstoppable Force.
Leave the House of Pride and continue on south to enter Alabastra.
Alabastra
Zones
- High Fulgen (22-40)
- Shadow Pass (22-40)
- Twilight Pass (22-40)
- Amaura (22-40)
- Bhaille (23-45)
Main Quests
Side Quests
Alabastra
Journey to Amaura
Your allies will be at at Camp Moondown in High Fulgen. It is decided that you will all travel separately and meet up in Amaura, all the way at the end of a long path through the zones of Alabastra. Take this time to prep and begin any side quests you like. When ready, leave the camp and continue on south towards Shadow Pass. The path forward is quite linear. There will be several side quests that become available as you make your trek and they will all align with your course so it may be worth doing them as you make your way forward. There will also be several brief events taking place as you journey to Amaura.
Crossing into Shadow Pass from High Fulgen, you will come across Alyn Shir and Ventrinio. Speak with them to learn about Bhaile and Tirnoch. Halfway through Shadow Pass, you can find Agarth taking a breather after dispatching Tuatha in the area. Cydan will be near the end of Shadow Pass as well, you can choose to assist him with the Tuatha. Twilight Pass has a couple of encampments you can stop by.
Once you reach Amaura, look for Cydan who will be with a Bitterfrost Warrior. After a brief conversation, Agarth will arrive with an Alfar soldier. Speak to Agarth to begin the final march towards the House of Vengeance.
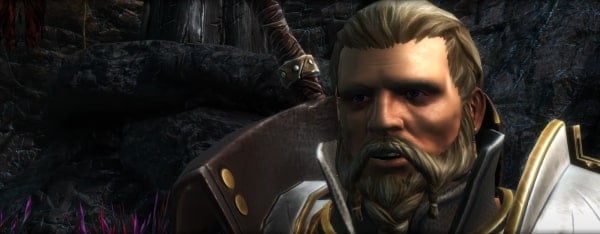
Inside, the path is pretty much straightforward and you will encounter a large number of Tuatha room by room. Agarth and Cydan can keep them busy while you kill them. Make use of a lot of AoE attacks. Try to save your Reckoning for the room with the Priests. There will be a room with a few Tuatha Overlords along with the lesser minions, always take the Overlords out first.
At the final room, you will encounter the Cur of Vengeance and begin the boss encounter. He fights much like Dren with the additional ability of summoning Niskaru to aid him. Try to keep your distance and let Agarth and Cydan soak up damage. Kill any Tuatha and Niskaru underlings before re-engaging the Cur. After a while, the Cur will teleport and summon three Niskaru. Destroy them and then focus the Cur down. This pattern will repeat for the entire fight, simply kite him, defeat his summons and re-engage.
After the fight, loot the room and head out the back and enter Bhaille.
Bhaille
At the entrance, you are greeted by Alyn Shir who explains the reason for her delay and promises to reveal more about your past as you fight your way through Bhaille. There will be a horde of Tuatha, Trolls and Niskaru along the way but they shouldn't pose too much of a threat by now. Press onward and make your way to the entrance of the Court of Winter, where Alyn Shir will reveal the final pieces to the puzzle surrounding The Fateless One.
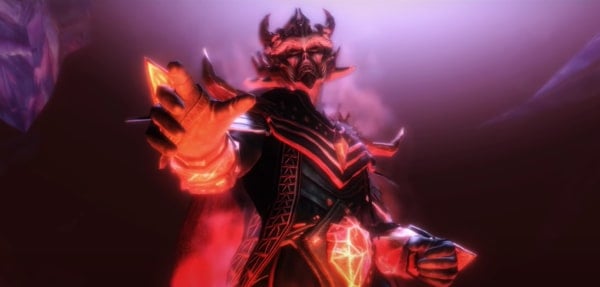
Inside the court, Gadflow awaits. Gadflow will begin the fight by summoning two copies of himself and you will fight the three of them simultaneously. The real Gadflow is the one without the aura. It's best not to focus Gadflow down as the clones will continually interrupt your attacks while Gadflow pummels you with his powerful spells. Fend off the clones while taking every opportunity to attack Gadflow. After a certain amount of time has passed, the clones will disappear along with Alyn Shir and Gadflow will teleport to a side of the room and cast runes on the ground. Stay away from the circles as they will explode. Get to the far side of the room and prepare to dodge his fire spell. After a few shots, he will remove the runes and resummon his clones, repeating the pattern from the beginning.
Once defeated, Alyn Shir reveals that it was simply an illusion and that Gadflow is likely hiding deeper within. The quest ends and the final quest begins
The Final Battle
Follow Alyn Shir west to the Amethyn. Inside, a cutscene plays that shows what transpired between Gadflow and Tirnoch. Inside the Amethyn, you are attacked by a Splinter of Fate. Copies of you that focus on different fighting styles based on Might, Finesse and Sorcery. You can tell by the weapons they use. Might will use greatswords and hammers. Finesse will have daggers or faeblades and Sorcery Fates will have chakrams. They shouldn't pose too much of a threat, stay on the offensive. There are a handful of Prismere equipment scattered across the tables and weapon racks here, loot them as you wish. Continue along, fighting more Fates on the way until you reach the Throne Room. Enter for a cutscene leading up to the final boss fight with Tirnoch.
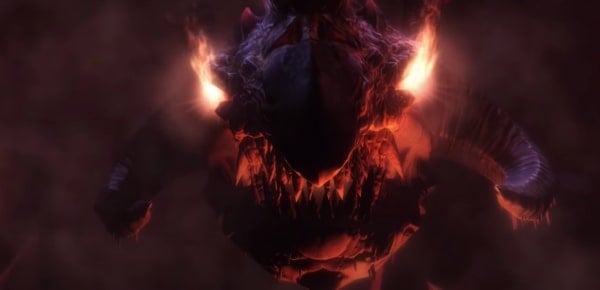
Tirnoch will create Splinters of Fate from you throughout the fight. Defeat them to fill up your Fate meter. Tirnoch has a horn smash attack where she drags her horn across the floor. Take note of which horn she lowers to the ground and back up accordingly. She will also throw Prismere shards at you. Dodge at the last second as they have a fair bit of homing. Other attacks to watch out for are her flame breath which has a fair amount of range, and flame pillars that she sends out of the ground.
Keep defeating the Splinters of Fate as you dodge her attacks and fill up your Fate Meter. When full, you can execute a special Reckoning mode attack that will drop her to the ground where you can pound on her. This process will repeat for pretty much the whole fight. Once you defeat her and the ending plays, you wake up in Rathir, where you're free to tackle any post-game challenges and other activities you missed.
Post-Game Activities

